Classic colour settings for home cinema are, for example, "Cinema" or, for other manufacturers, "Cinema". For business projectors used in conference or meeting rooms, we recommend the "Presentation" colour setting or a comparable setting. Although this reduces colour fidelity, it offers high brightness. Ideal for bright rooms.
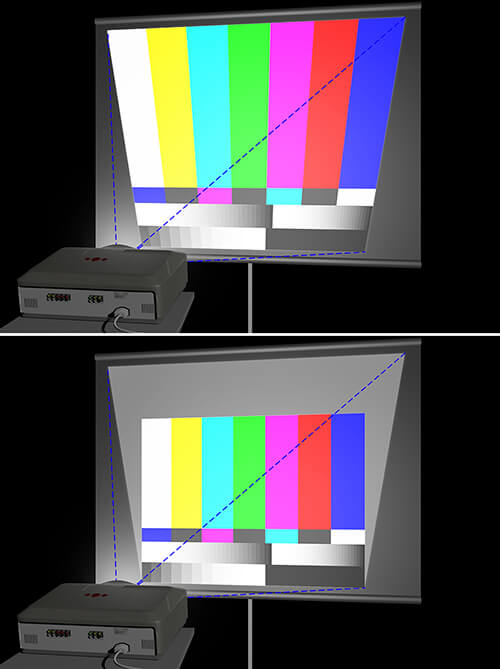
In contrast, avoid the "Bright" or "Bright" picture setting. Here you can achieve maximum brightness, but at the expense of picture quality. If you want to carry out a calibration yourself, this may not reach the level of a professional calibration, but it can improve the image. Use test images for this. You can find a suitable provider via Google search.