mac-beamer-thunderbold-b-big

How-To

Simply connect the projector to the Mac

The fastest connection solution for MacBook & iMac!

With the further development of Apple computers, not only the design changed, but also the connectivity of the fancy devices. Here we explain how to easily connect a projector to a Mac. Suitable for MacBook Pro, iMac, Mac Mini and MacBook Air.

Content

Quick Info - Connections

projektor-nobubble

Projector connections

A projector has at least one VGA connection. Other possible inputs are DVI, HDMI or DisplayPort.

pc-mac-nobubble

Mac connections

Older Mac models (approx. from 2008) are usually equipped with a DVI or Mini-DVI interface, from 2010 with a Mini-DisplayPort. Newer devices (approx. from 2013) already support the modern interface protocol Thunderbolt. And have a corresponding socket

usb-nobubble

Matching cables & adapters

There is a suitable cable or adapter for almost every projector-Mac combination. Apple or third-party suppliers have an adapter ready for every combination. Often used adapters are HDMI-to-Thunderbolt and VGA-to-Thunderbolt.

Our product recommendations

Mac with DVI connection

Older 15-inch MacBooks (from around 2008), which were already available in the stylish aluminium unibody case, had a DVI connection.

mac-beamer-dvi

This is how it works: Either you use a DVI-to-HDMI adapter and connect the HDMI cable there. Or you use a DVI-to-HDMI cable. In the second case, no further cable would be needed. For projector or monitors with a DVI connection, a conventional DVI cable is sufficient.

Tip: The older 13 inch MacBooks, on the other hand, are equipped with a Mini-DVI port. It is reminiscent of the Thunderbolt port still used on some Macs. The form has hardly changed over the years. Use a mini-DVI-to-HDMI adapter or a mini-DVI-to-HDMI cable. However, Apple mainly offers Mini-DVI-to-DVI adapters , neither of which supports audio output. The DVI, Mini-DVI and Mini-DisplayPort connections are only designed for image transmission.

Mac with Mini DisplayPort connector

As of 2010, the DVI and Mini-DVI connections were replaced by the Mini-DisplayPort connection. The Mini-DisplayPort looks similar to the Mini-DVI connector. However, the Mini-DisplayPort connector only supports image output.

Here's how: You need a mini DisplayPort to VGA adapter or a mini DisplayPort to DVI adapter. You can also get these adapters as original adapters from Apple.

mac-beamer-mini-displayport-vga-big
mac-beamer-mini-displayport-dvi-big
mac-beamer-mini-displayport-hdmi

Tip: A mini DisplayPort-to-HDMI adapter, such as the one from HAMA, is more convenient and cheaper.

The advantage: With a digital signal, you only have to adapt once. If you use the Mini-DisplayPort to DVI adapter, you usually have to adapt twice to DVI and then to HDMI.

Mac with Thunderbolt port

Over time, Mac devices were gradually equipped with the modern Thunderbolt connection. The most important innovation was the possibility of sound transmission. In addition, the new connection also supported the transfer of data. Thanks to this feature, it replaced the Fire Wire connector on Apple's devices. Apple officially introduced the Thunderbolt port in 2011. The form factor was taken over from the Mini-DisplayPort.

mac-beamer-thunderbold-big

Here's how: If you use a Thunderbolt or Mini DisplayPort-to-HDMI adapter, you can route the sound via HDMI to a TV or AV receiver. This is a good solution for a home cinema or video presentations. You can also use this to transmit the sound from the Mac directly to the projector. However, this only makes sense if your projector is equipped with speakers.

Tip: The Thunderbolt connection on Mini-DisplayPort connector basis has survived to this day and is still used on MacBook (until 2015), Mac Book Air (current - 2018) and Mac Mini (current). So if you want to connect a projector to the MacBook Air, for example, you still need an adapter.

The slot in the MacBook, iMac and Mac Mini is the same as the Mini DisplayPort. However, it is now marked with a lightning symbol.

Mac with HDMI connection

In 2012, Apple began to equip the new MacBooks and Mac Mini with an HDMI port. With this, Apple took a step further towards better device compatibility.

mac-beamer-hdmi

This is how it works: To connect your Mac to a projector, all you need is an HDMI cable.

Tip: Both the MacBook Pro models with HDMI and the Mac Mini offer one or two Thunderbolt ports in addition to the HDMI port. In addition to the graphic output for a second monitor, this can also be used for an external hard drive. The HDMI port is still used on the Mac Mini, while it has been abolished on the MacBook and MacBook Pro

Mac with USB-C (Thunderbolt 3)

The current video port on Apple devices is the USB-C or also known as Thunderbolt 3. Together with the shrinking cases of the Macs, this port has also become smaller. This also explains the construction-related omission of an HDMI interface.

mac-beamer-usbc-kabel-big
mac-beamer-mini-displayport-vga-big (1)

This is how it works: If you want to connect a new Mac to a projector, you need a USB-C to HDMI adapter.

Tip: From 2016, Apple has relied exclusively on the USB-C interface for the MacBook Pro (2x or 4x USB-C). It is now used for power supply, data, image and sound transmission.

Connect Mac wirelessly

Of course, you can also connect a Mac wirelessly to the projector.

Icon Airplay

Apple Airplay

This is probably the easiest method if your projector is AirPlay-enabled.

  • Make sure your Mac and the projector are on the same Wi-Fi network
  • Click on the AirPlay icon (a rectangle with a triangle at the bottom) in the menu bar of your Mac
  • Select the projector from the list of available devices
  • Your screen should now be displayed on the projector
Apple TV

Apple TV

If your projector is not AirPlay-enabled, you can use an Apple TV to provide the AirPlay function:

  • Connect the Apple TV to the projector
  • Make sure that both your Mac and the Apple TV are connected to the same Wi-Fi network
  • Follow the same steps as when using AirPlay
Icon Connection between devices

Wireless presentation systems

Some projectors may not support wireless connections via AirPlay. In this case, you can use a wireless display adapter. These devices can transmit HDMI signals via a wireless connection.

  • Connect the Wireless Display Adapter to the Projector
  • Make sure your Mac and the adapter are on the same Wi-Fi network
  • Follow the manufacturer's instructions to establish the connection

Our product recommendations for your wireless presentation:

barco_clickshare_conference_cx-30_2d_0002

Barco ClickShare

The Barco ClickShare provides an easy wireless connection between a Mac and a projector. Plug the ClickShare Button into the USB port of the Mac and connect the ClickShare base unit to the projector. You can then project content from your Mac to the projector. The screen sharing function allows multiple users to view their content at the same time. The ClickShare is a practical solution for meetings and training sessions.
BenQ InstaShow WDC10C

BenQ InstaShow

The BenQ InstaShow enables an easy wireless connection between a Mac and a projector. The base unit connects to the projector and the button plugs into the Mac's USB-C or HDMI port. No additional installations are required. Content can be projected wirelessly and in high quality onto the projector. InstaShow also supports screen sharing for multiple users. It is ideal for meeting rooms and classrooms as it avoids cable clutter and allows for a smooth presentation.
Airtame-2-Wireless-Mirror-Screen-HDMI-Dongle

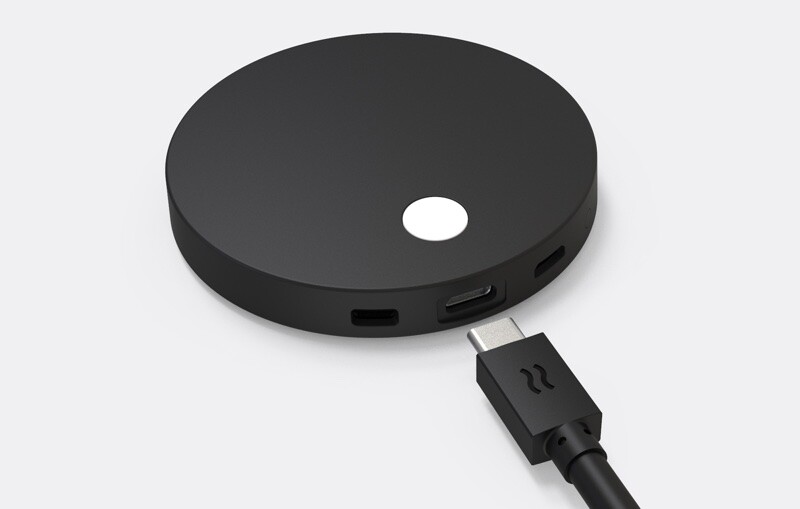
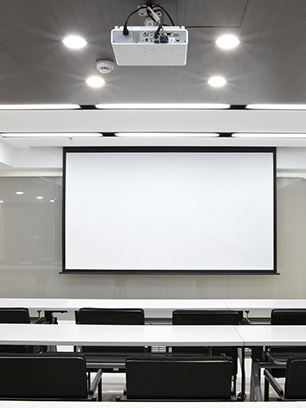
Airtame 2 Wireless Mirror Screen

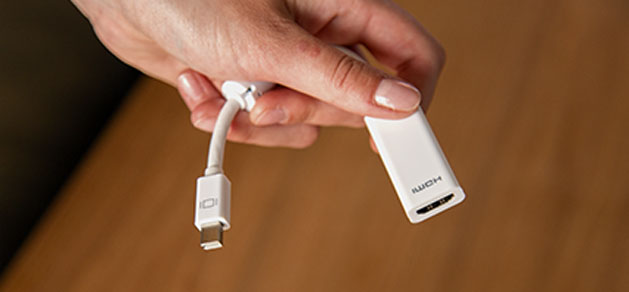
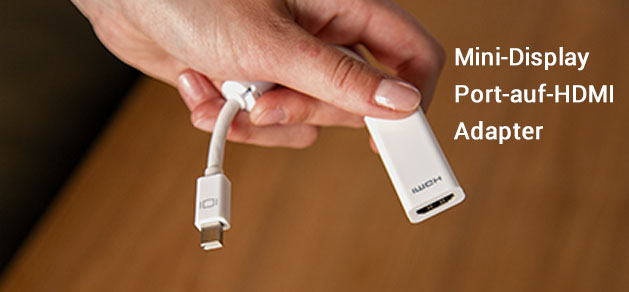
The Airtame 2 is connected and powered via the projector's HDMI port . The Airtame app enables wireless connection to the Mac. Content can be mirrored to the projector in high quality and without delay. It supports Full HD resolution and offers features such as screen splitting. Control is via a user-friendly interface and the Airtame app. The Airtame 2 is a practical solution for sharing content on a projector.

Our product recommendations

kachel_kabel_connectivity

Cables & Connectivity

Tobias Berg and Oliver Stenzel - contact persons in Purchasing and Sales - write on glass pane

Do you still have open questions?

We are also happy to advise you personally - we look forward to your call or email! If you would prefer us to call you back free of charge, simply leave your contact details with us now.